

How to Submit a Test Report
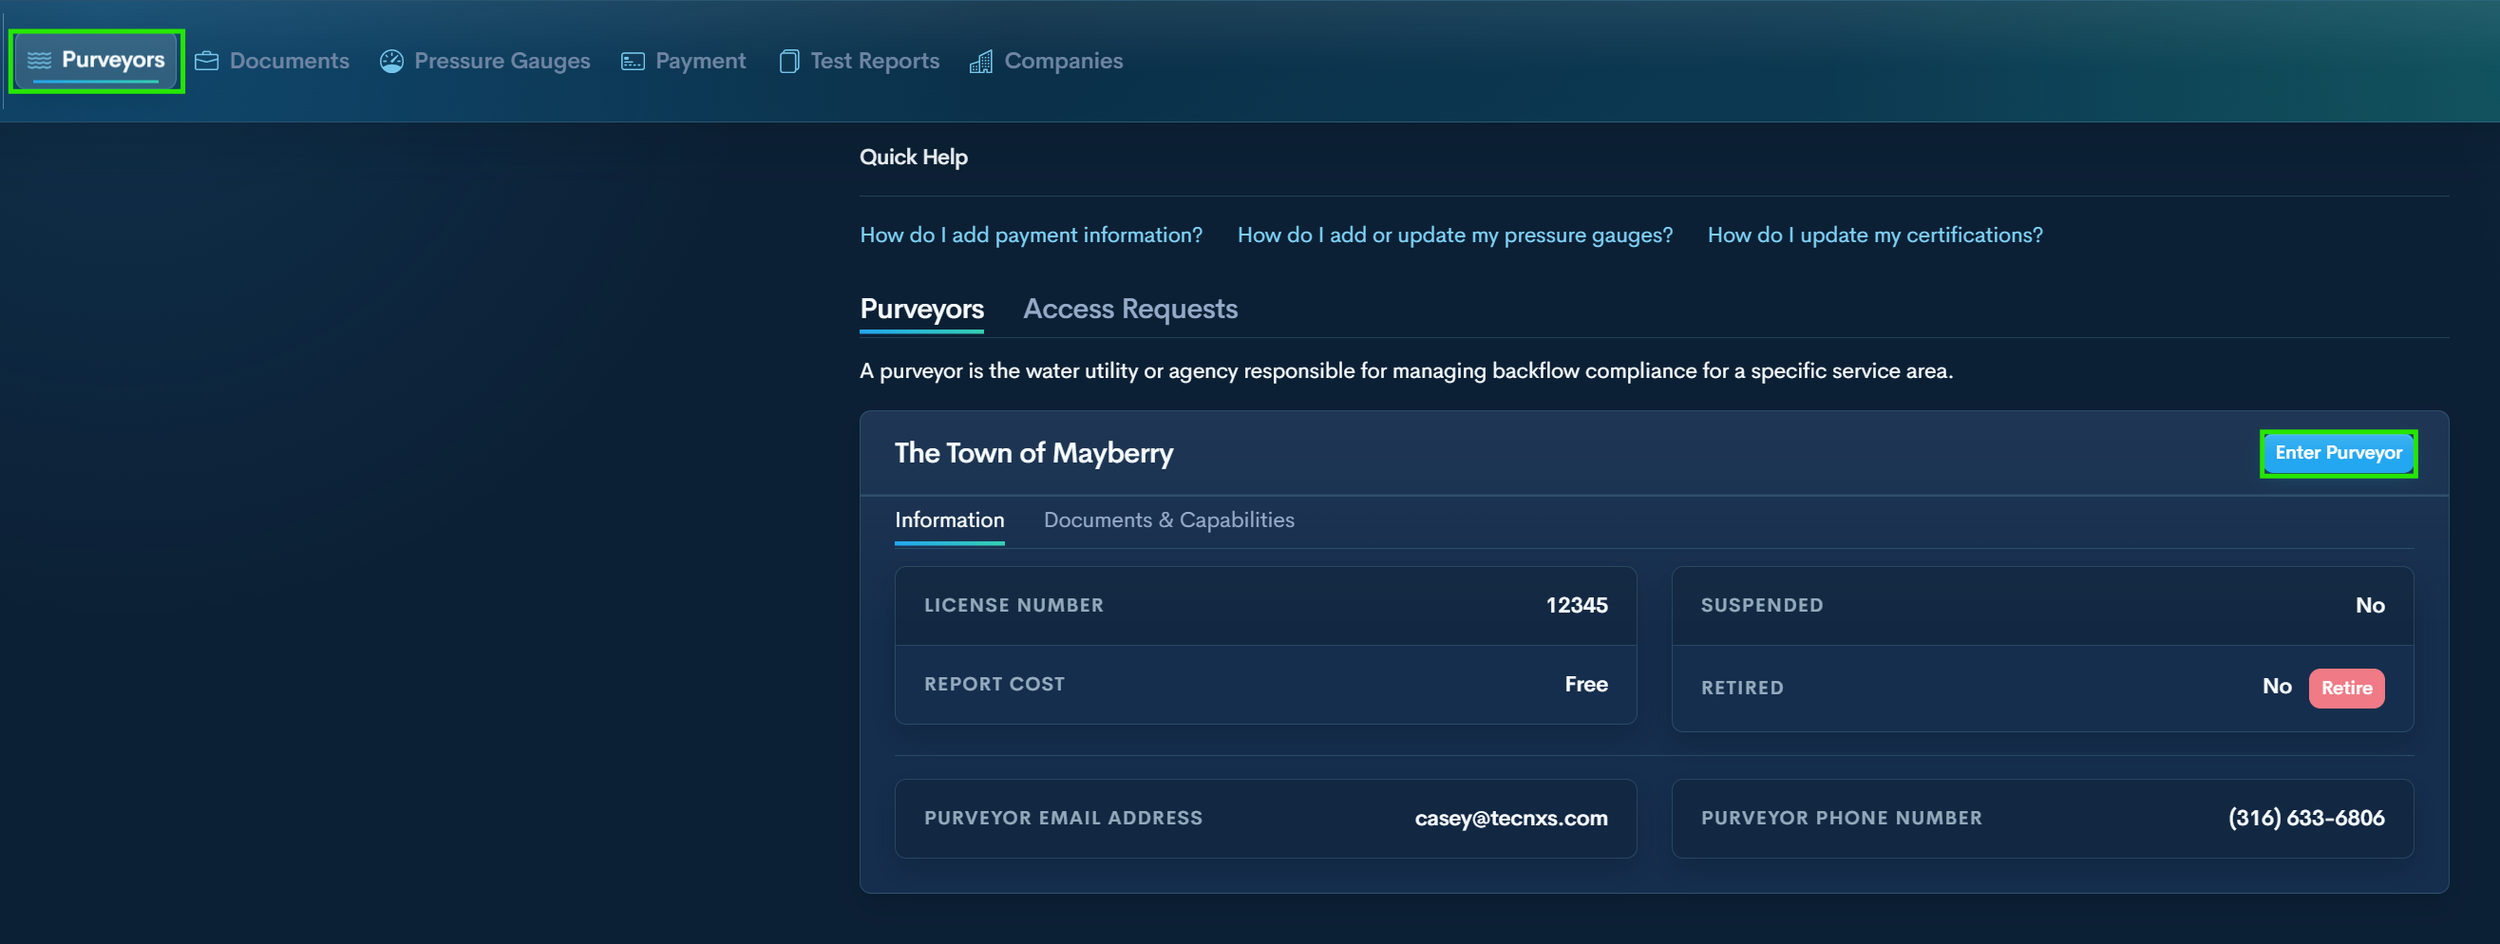
Step 1 — Enter Purveyor
In the Purveyors section, click Enter Purveyor on desired Utility.
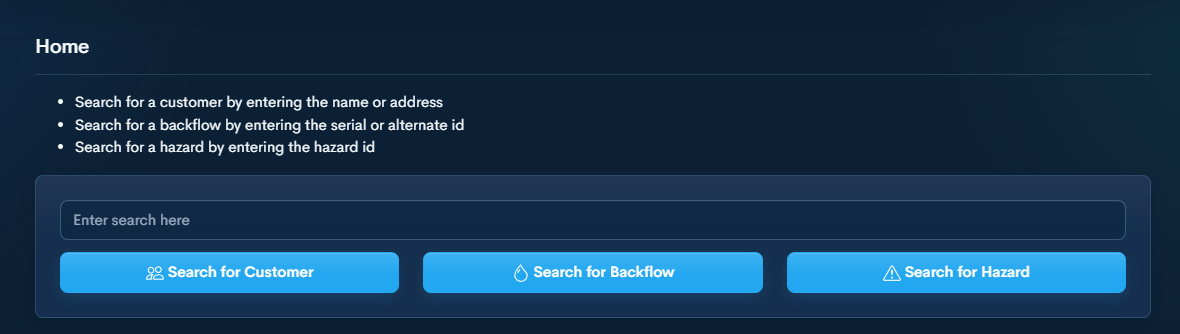
Step 2 — Search for Customer or Device
Enter your search in the search bar, then choose:
Search for Customer (name or address)
Search for Backflow (serial number or Alt ID)
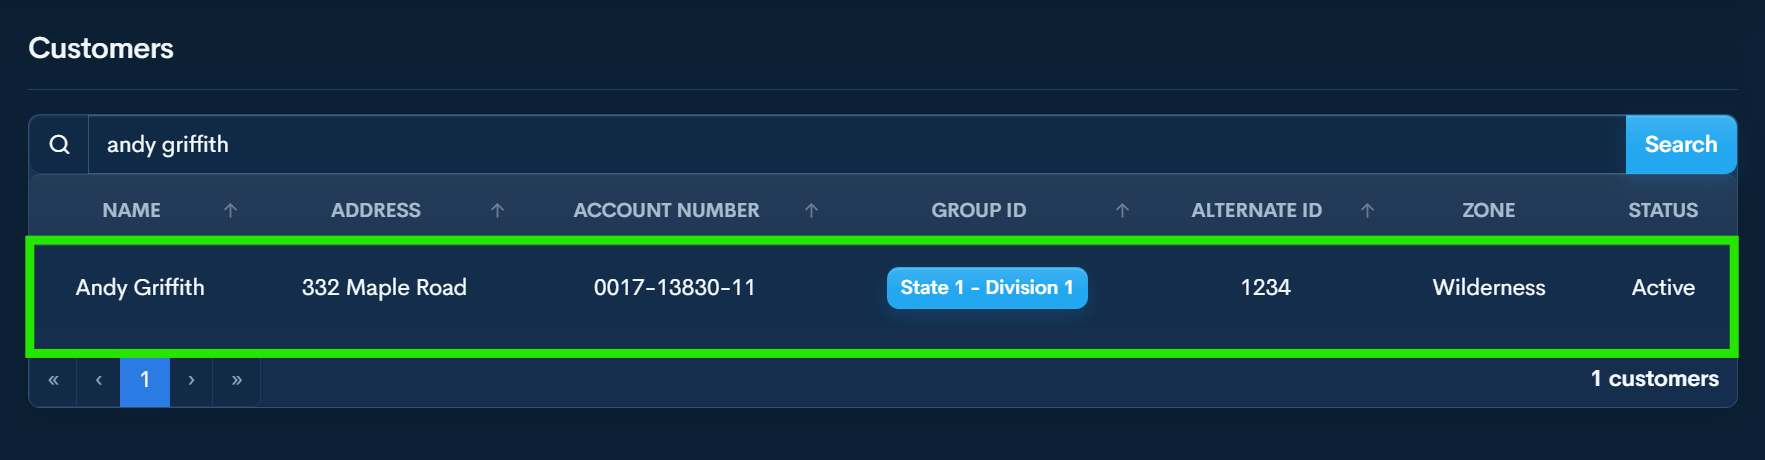
Step 3 — Open the Record
Click the correct result to open the customer/address page.
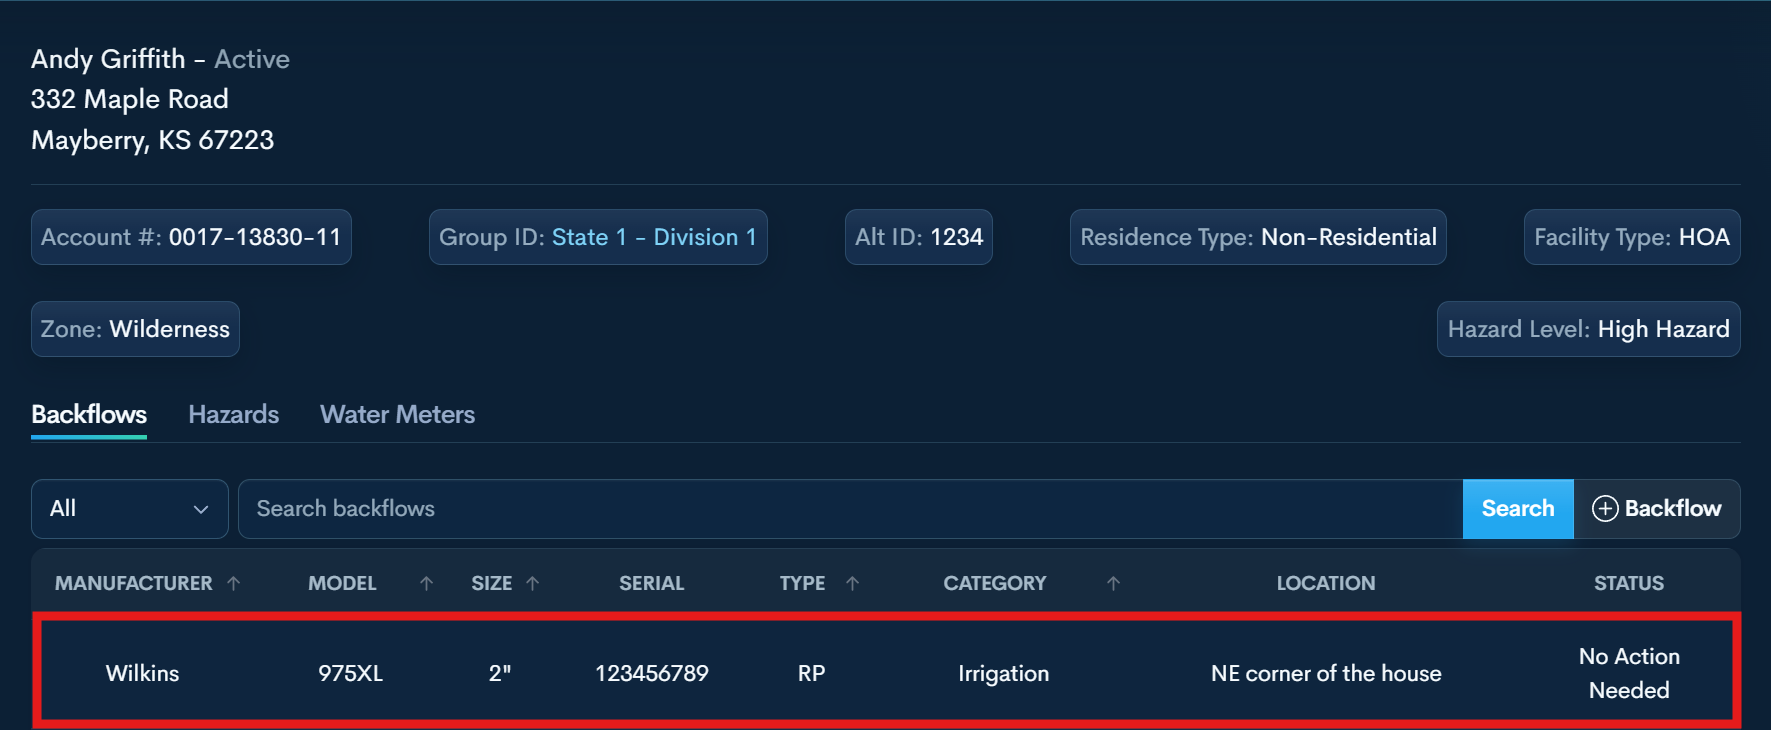
Step 4 — Select the Device
Find and click the backflow device you tested.
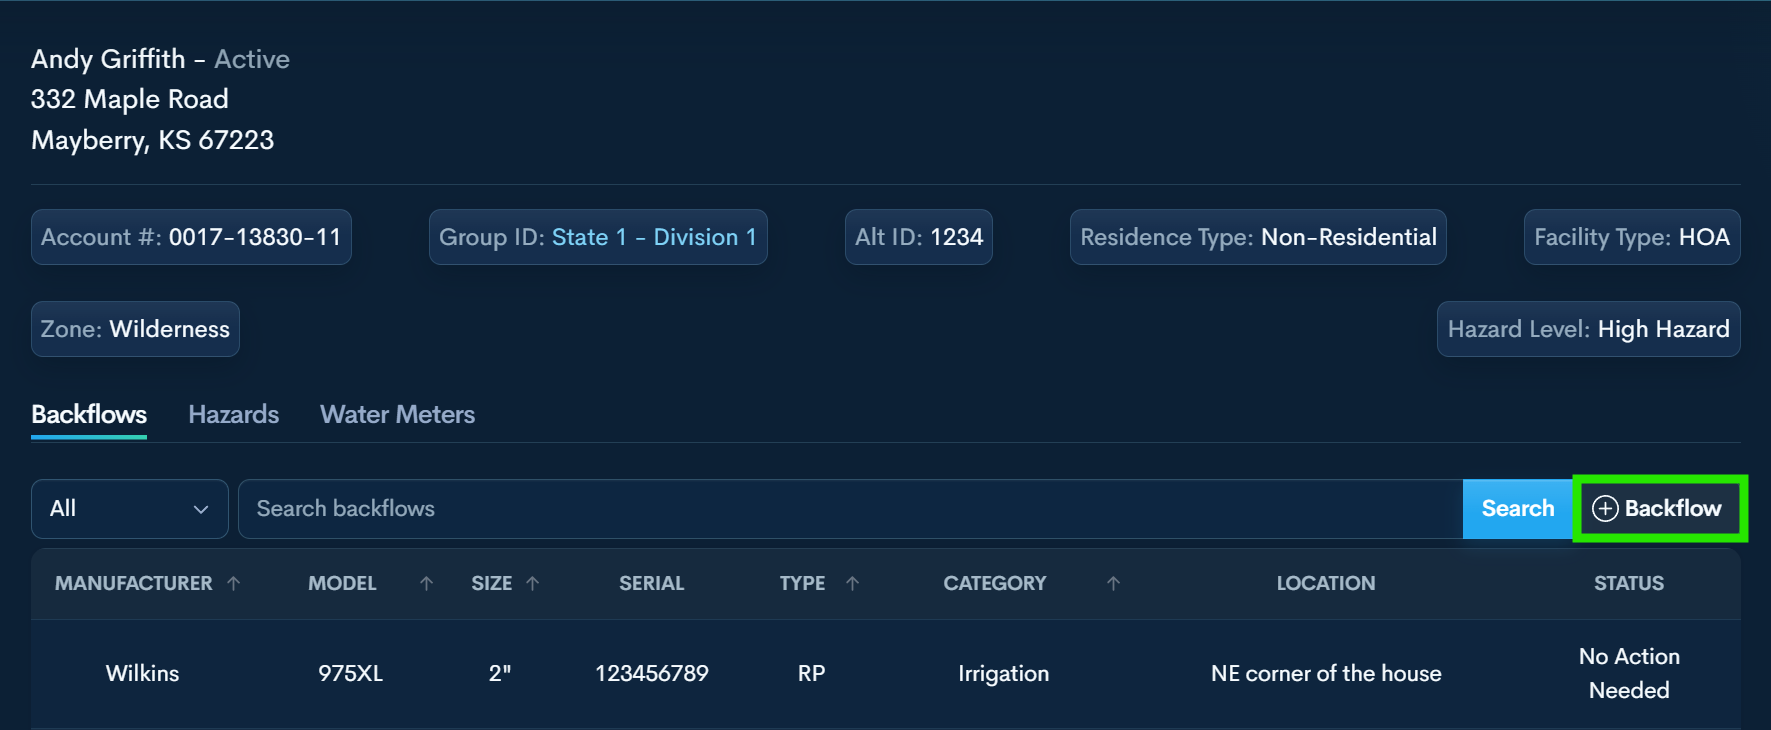
Step 5 — Add Device (If Needed)
If missing and allowed:
Click +Backflow, enter details, then Add Device.
Select the new device.
Do NOT use this when replacing a device.
If you are replacing a device, use “Removed and Replaced Device” in the report type through the old device.
Step 6— Select Device
Once you search the customer address, or search by Serial Number, clicking on the desired device will reveal its options.
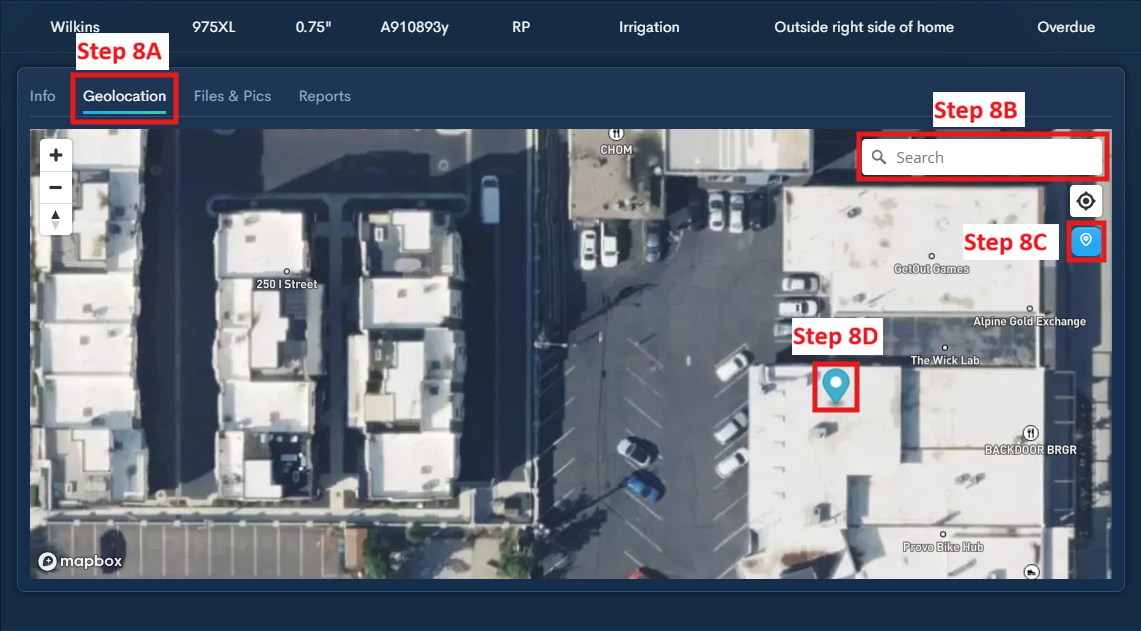
Step 7 — Complete Geolocation (If Required) IF NOT, SKIP TO STEP 9
8A - Select Geolocation under the desired device.
8B - If not onsite, search for the address to pull it up on the map.
8C - This button will place the GPS marker for the device.
8D - Once the marker is placed, you can click on it to move it to the desired location. It saves wherever you leave it.
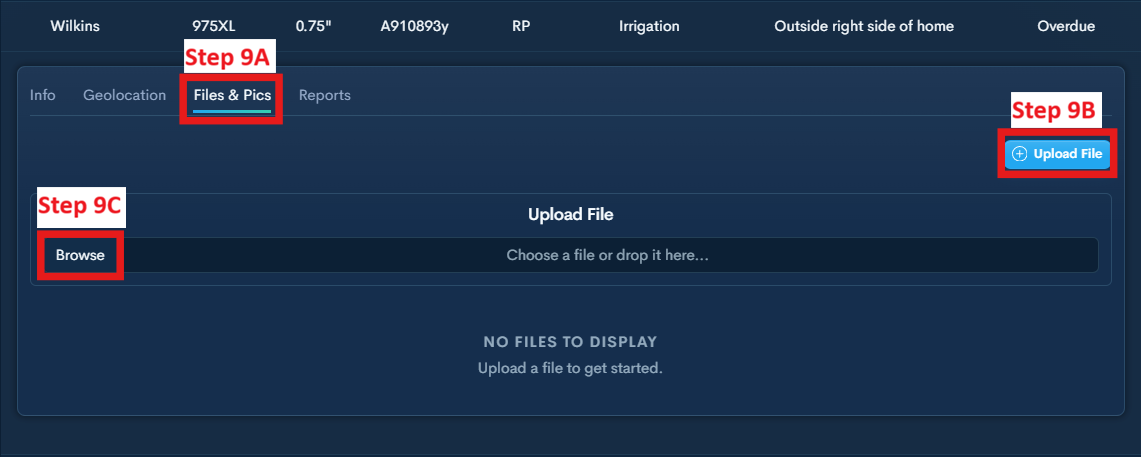
Step 8— Add Photo (If Required) IF NOT, SKIP TO STEP 9
Upload a photo if the purveyor requires at least one per device.
9A - Select Files & Pics under the desired device.
9B - Select Upload File.
9C - Select Browse to open file explorer to select photo.
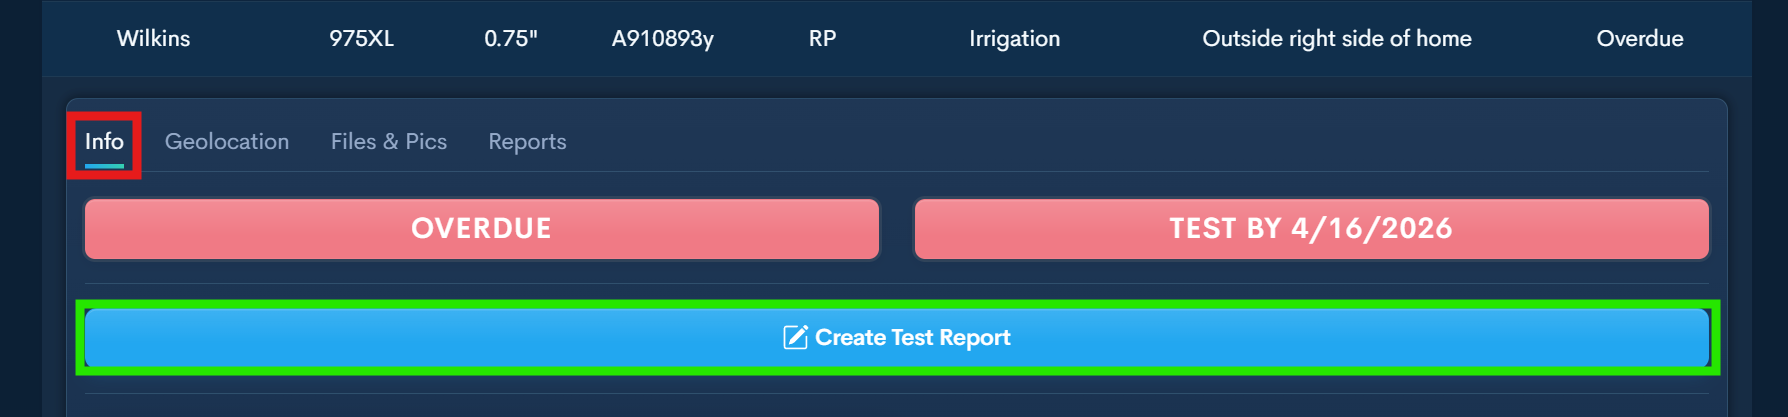
Step 9 — Create Test Report 📝
Click the Info tab then click Create Test Report.
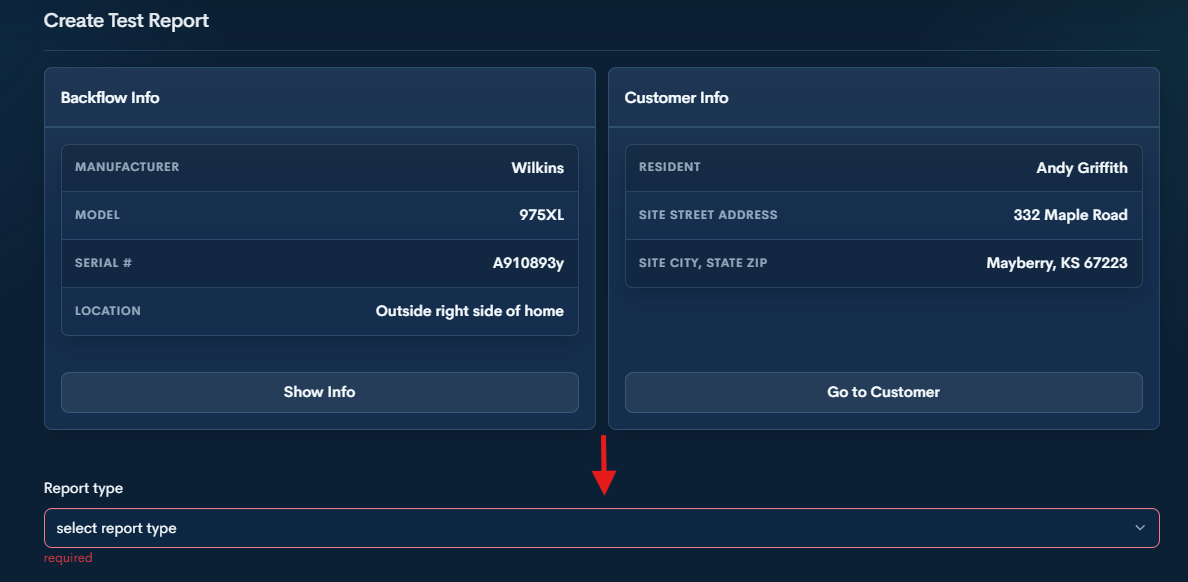
Step 10— Select Report Type
Select the Report Type that matches the situation for the device:
Recurring Test
Use for a standard annual backflow test.
Rebuild and Test
Use when the device was rebuilt and then tested.
Repair and Test
Use when the device failed the initial test, repairs were completed, and the device was tested again.
Removed and Replaced Device
Use when the existing device was replaced with a new one. You will need to enter the new device information and complete the test.
Removed Device and Capped Line
Use when the device was completely removed and the line was capped.
Step 11 — Complete Test Form
Enter readings, select your pressure gauge, and complete all required fields.
Step 12 — Sign and Submit
Add your signature, check the confirmation box, and click Submit.
If anything is missing, complete the highlighted fields and submit again.